Showing posts with label crafts. Show all posts

Saturday, February 16, 2013

Like I was saying

After Skinny Man got his Valentine's Day goodies, I would share them here. 

But first I would like to show you the pretty flowers I revived because he did a great job picking out something he knew I would love:

I'm a lucky girl!
Here is what I made for Skinny Man.

He had mentioned he might like a tie blanket. After seeing fleece on sale at JoAnn's, my best friend helped me pick out the right amount of fleece. Skinny Man is tall and skinny. I wanted the blanket to be long enough for him at it was! Before I tied the blanket together, I sewed a special message inside on a scrap piece of fleece. From the outside, no one could see it, but he could find it and know where it was. 

Max helped me over winter break on this project.
I'm really sad I didn't snap a picture of the handmade book. Basically, I picked up some brown bags at the dollar store and 2 pieces of felt. Typed a few notes on note cards. Printed some pictures. Decorated the cover. I found this idea here, but I modified it and was very happy with the results. It was something simple, but I think he really liked it. I was worried he would find it girly and lame, if he did he kept it from me. I joked with him that he can read it every night before bed. 

After hearing that his lightening cable was tearing, I immediately knew something I could add a personal touch to something he uses daily. 

While this one was very easy to complete, it was very time consuming. I'm not complaining because it will help the cord stand up to everyday ware and I know he will get a lot of use out of it. He talked about getting a new cable earlier this week and I tried to differ him from purchasing one and ruining my plan. Luckily I think he was pretty surprised to see what I came up with for him. 

Since we would be seeing each other on Friday, he got his gifts from me when I "tried" to surprise him at school. I had told him I was stopping home first before leaving to pick him up when really I was already parked outside his building. My plan was working perfectly until he heard a siren in my end of the phone and then heard it go past him. It almost worked. Either way, I know he was very happy to see me. 

Even though it was well below freezing we made a stop at Red Mango tonight. Any fro-yo fans out there?

This girl is going to bed. Goodnight all!

Ashlyn

Sunday, February 10, 2013

Saw it on Pinterest

This so called "Sharpie Mugs" have been all the rage on Pinterest. Some work better than others, but this one I found to be the most helpful. I had made a few with different markers and they faded fast. I just took the writing off with nail polish remover and put the mug aside until I could get better markers.

I like the mugs from the Dollar Store. I'm sad to say that I am there wayyy too often. I just can't help it, everything is a dollar.

After the first round of mugs fading, I knew I needed something different. I talked with someone at Micheal's and they recommended the Sharpie Paint Markers, that are oil based. Guess who had some awesome coupons and saved ten bucks? ME!

I also nabbed some fancy graphite pencil we used in art. I had a few ideas in mind and I want to be able to trace something and have it go onto the mug before taking a marker to it. This worked very nicely after a few attempts.

This mug is a gift for my youth director. It's part joke but she also partly said she wanted an "I heart Honey Boo Boo" mug. I am hoping for a nice finished product to surprise her with!

Here is how I did it: 

I typed up what I wanted and printed it out. This was the easy part.


Cut it down to size so it would go on the mug. Also, very easy.


Take that fancy graphite pencil and trace on the back of the paper. I put it on the window so I could get a nice trace. I also went over it another time to make it dark. 


Why on the back you ask? So when you type it on the mug, the words are the correct way. Any tape works, it just happened I had painters tape handy. And I knew it wouldn't rip the paper.

Why is she tracing the front of the paper? It's to put pressure on the paper and get the tracing you did on the back to go on to the mug.

 After you take the paper off the mug will look like this.

Then just go over it with the paint markers. And don't worry if you make a mistake, it wipes off with a little nail polish remover.
I think it turned out pretty good! I just need to throw it in the oven after waiting for it to dry for at least 24 hours. Based on a few articles I've read, I bake my mugs at 325 degrees for 40 mins. You must put the mug in the oven while it preheats so the mug warms up with the oven. You might need to adjust the time based on how long your oven takes to preheat. Be sure to keep an eye on them to make sure they don't turn yellow, another problem I've read. After 40 or so minutes turn the oven off, but leave the mugs in there to cool. I made the mistake of touching a mug after it cooled down and it smudged it. I touched it up and I will send it back in the oven with this mug here. I can't say for sure if these guys are safe for the dishwasher, but I will try it and let you guys know!

I'm gonna go watch the Grammy Red Carpet for now and later tune into Honey Boo Boo. Enjoy the last few hours of your weekend, friends!

Ashlyn

Wednesday, January 9, 2013

T-Shirt Blanket

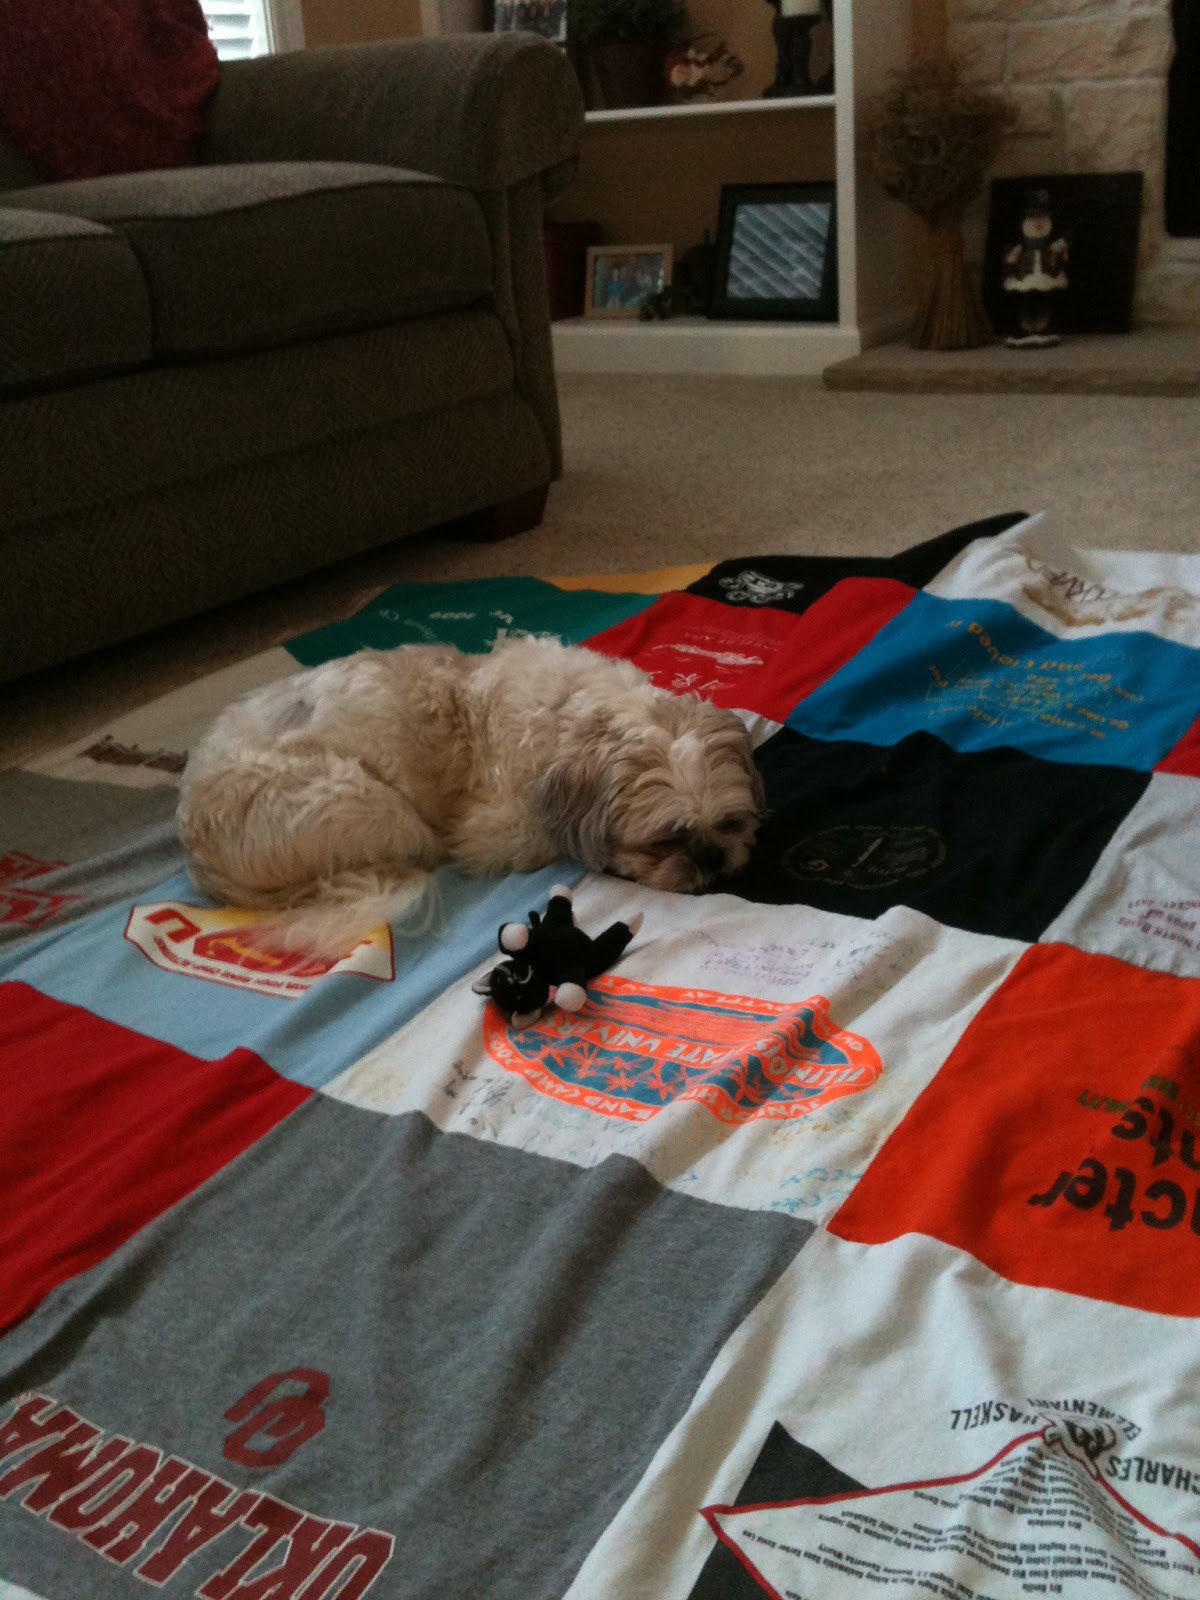
Today friends I would like to share a very special blanket with you. I present the T-Shirt blanket! I am one of those people who has a hard time letting go of shirts, especially if there are good memories attached to them. After seeing these guys pop up all over Pinterest and knew I needed to make my own.

Wait Max, sit there and let me take your picture.
Since I'm so nice and kind, I thought I would share the steps I took and my recommendations with y'all! 

 -Save shirts that you find to have meaning to you or are from something special, like a trip or school event. 

-Take your time! This is big. I am very impatient and it was hard for me to really slow down because I just wanted to finish it. If you rush your blanket will end up sloppy. 

-Use a template. After looking at all your shirts, decide what size you wanna make the square tiles. These will have to be the same or the blanket won't turn out correctly. 

-Locate a rotatory cutter or sharp sewing scissors. Cotton shirts are difficult to cut. Trace your template on to the shirt and cut along those lines.

-After you cut all the squares, start laying them out and figuring out where you want each one to go. Once you have a piece for each shirt, start pinning them into rows. Now sew them together.
 
-Once you have sewed all the squares together you will need to decide what kind of material you want to put on the back. I have heard of people using double the amount of t-shirts and using that as the back. For my blanket I choose to use a flat bed sheet. My mom picked up a full sheet from Walmart that had lots of colors to match my shirts. I like the feeling of the sheet because it is cool and I tend to always be warm. Good combo for me, but pick something that suits your needs. 

-Pin both sides together and sew. This explains itself. Again take your time!

-The last thing you need to do (what I finished today) "tack" it together. Tacking meaning sew the corners of the squares together and through the backing. That's the best I can explain that step. Sorry guys. 

And then I could get him off of it...

But I didn't mind because he was super cute.

Ta da!! All done. I started this project last Memorial Day, but soon realized I got myself into a big mess. Grandma to the rescue! She took almost the whole thing apart and resewed it together. When I sewed it the first time, I had trouble lining all the seems up and making it look nice and neat. My mom wanted it to look nice so it's something I could be proud of and keep for years. Needless to say, I'm very happy with the end result!
Now this blanket needs to be washed before I can take it back to curl up with at school. But I might take a nap with it first. Mhmmm tempting.....  

Ashlyn